By Nicole Fava
We’ve all gawked at horses with thick, luscious tails wondering why our own horse didn’t get as lucky. A horse with a nice tail is most likely one with “good hair genes”. You may notice that a Gypsy Vanner will almost always have a thicker tail than a Thoroughbred. Though we can’t control our horse’s genetics, we can maintain their tail in a way that protects it and promotes its growth. A common method of doing this is using a tail bag.
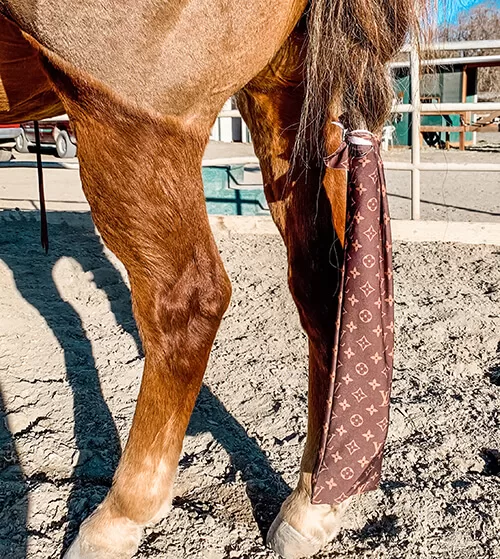
A tail bag exactly what it sounds like, and it is usually made of lycra or nylon. The best part? They come in all kinds of fun colors and patterns!
The Benefits of a Tail Bag
1. They protect your horse’s tail from dirt and debris. My horse always manages to pick up burrs and branches in his tail… this is not an issue when he wears a tail bag!
2. They keep your horse’s tail from getting knotted and tangled. Wind knots are fairly common and can be a pain to remove, removing hair with them!
3. They keep your horse from stepping on their tail. If you do reining or a similar event, you know that this can be an issue when a horse stops hard.
4. They prevent breakage. With a tail bag, you can avoid excessive brushing that pulls out hair and can thin out your horse’s tail.
5. They save you time. When you keep your horse’s tail in a tail bag, you only need to brush it out after washing it and before rebraiding.
The Negatives of a Tail Bags
1. They take away your horse’s fly swatting capabilities. For this reason, I do not recommends using a tail bag in the summertime without a fly sheet.
2. Some horses dislike them. Many horses will be irritated with tail bags and will swish their tails in displeasure.
3. An incorrectly applied tail bag can be dangerous. You must always be sure to apply the bag below the tailbone, otherwise you risk cutting off blood flow. We’ll get into proper application below!
How to Apply a Tail Bag
1. Wash your horse’s tail with shampoo. Rinse, apply conditioner, then rinse again. You may also consider a leave-in conditioner.
2. Brush out your horse’s tail and let it dry.
3. Find the end of the tail bone. Divide the hair evenly into three sections to braid it securely downwards.
4. Braid down the tail as far as you can go. Tie it with two or three braiding bands, or one “human” hair elastic (I tend to prefer these for thicker tails)!
5. Insert the braid into your tail bag.
6. Pull the bag up to the base of the tail bone, where your braid starts. Create an opening in the hair near the top of the braid and feed one of the bag’s tabs through it.
7. Wrap the other tab around the top of the braid. This is where it’s extremely important to check in and make sure that you are not tying the bag directly onto the tail bone.
8. Tie both tabs together using a secure knot.
I usually remove my horse’s tail from the tail bag once per week. If I notice that his tail is dirty, I may repeat all of the above steps. If his tail looks clean, I will simply brush it out, rebraid it, and apply the tail bag once again!
A tail bag is not for every horse, but it might be just what you need to get that thick, luscious tail that you’ve always dreamed of!